Synaptic is a graphical user interface (GUI) for managing software packages on Debian-based distributions. If you are using Debian or Ubuntu you will easily find Synaptic in the System Tools menu or in the Administration menu. Synaptic uses the GTK graphic libraries . So, if you are using GNOME on your debian-based distro you will probably have Synaptic installed as well. Synaptic is a graphical package management program for apt. It provides the same features as the apt-get command line utility with a GUI front-end based on Gtk+.
Now we will see how to add repositories,install,remove and update software packages Using Synaptic Package Manager
Adding repositories Using Synaptic
To Open Synaptic Package manager go to System--->Administration--->Synaptic package manager

once it opens you should see the following screen asking for the password for root or equivalent users.To manage package installations you need administration privileges; so you need to either be root or to authenticate as such.

Once it open the Synaptic Package Manager you should see the following screen.The main window is divided into three sections that is a package browser on the left, the package list on the upper right, and package details on the lower right. The status bar shows you the system state at a glance.

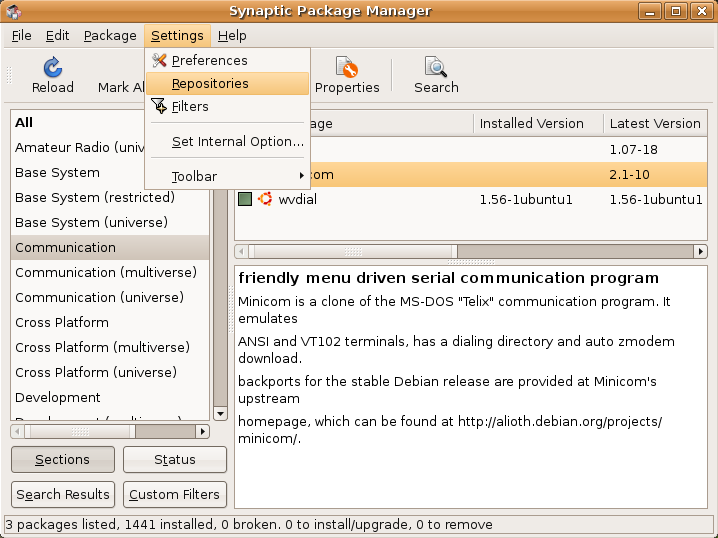
Now if you want to add repositories you need to go to settings--->Repositories you can see this in the following screen
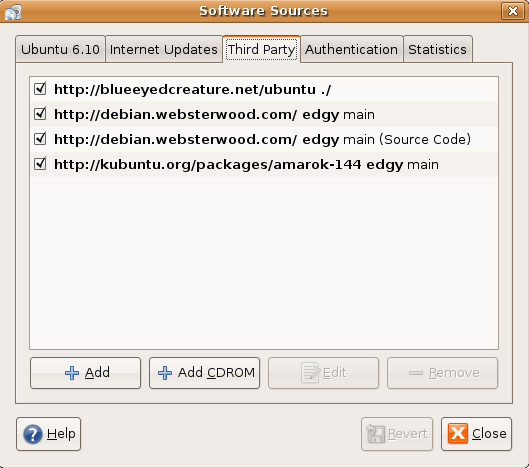
Once it opens the Repositories menu you should see the following screen in this screen you can select repositories,internet updates,Third party,Authentication and statistics.Now we will see one by one first tab is ubuntu 6.10 repositories you need to select which one you want to add like main,universe,multiverse,restricted,source code and the name of the server you want to download from

Now we will see each one what it means if you want more information check here
Main Repositories
Restricted Repositories
The restricted component is reserved for software that is very commonly used, and which is supported by the Ubuntu team even though it is not available under a completely free licence. Please note that it may not be possible to provide complete support for this software since we are unable to fix the software ourselves, but can only forward problem reports to the actual authors.Universe Repositories
The universe component is a snapshot of the free, open source, and Linux world. In universe you can find almost every piece of open source software, and software available under a variety of less open licences, all built automatically from a variety of public sources. All of this software is compiled against the libraries and using the tools that form part of main, so it should install and work well with the software in main, but it comes with no guarantee of security fixes and support. The universe component includes thousands of pieces of software. Through universe, users are able to have the diversity and flexibility offered by the vast open source world on top of a stable Ubuntu core.Multiverse Repositories
The "multiverse" component contains software that is "not free", which means the licensing requirements of this software do not meet the Ubuntu "main" Component Licence Policy.Now if you click on Internet Updates tab you should see the following screen here you need to select what updates you want to run,when to update these updates and you want to install these updates

Now if you click on Third party tab you can enter third Party repositories and cdrom repositories here
If you want to add new source click on add you should see the following screen here you need to enter your source and click on add source

Next one is if you click on authentication tab here you can import the authentication keys for the packages you can click on import key file to import

Final Tab is Statistics this is only for popularity contest

After finishing all your settings you need to click on close once you click on close.you should see the following screen with the information saying you need to click on reload button to take effects of your new settings

Now you need to click on reload button located at the top panel of Synaptic manager or simply you can press or press Ctrl + R

You can see all the required packages are downloading in progress once it finish the download you are ready with your new Repositories list.

Ubuntu Dapper users
If you are using ubuntu 6.06 (dapper) and other versions when you open settings--->Repositories you can see this in the following screen under installation media tab


For example you want to install a package called dia-gnome for this you need to select the package and right click on that you should see the following screen here you need to select mark for installation or press Ctrl + I

This will popup a window saying that some of the other packages also required changes click on mark

You can see this package is marked for installation with an arrow mark next to the check box

Now you need to apply these changes by clicking on "Apply" in the toolbar or press Ctrl + P

Now it will show you the packages are going to be installed here you need to click on apply

Downloading all the required packages in progress

Installing the package is in progress

If you want to see the details of the installation package you can see in the following screen

Changes are applied successfully windows and click on close

Remove a Package Using Synaptic Package Manager
Now if you want to remove installed package you need to select that package and right click on that you need to select Mark for removal option


You need to Click Reload or press Ctrl + R to make Synaptic aware of the latest updates.
Now you need to Right-click on the package you want to upgrade and choose Mark for Upgrade from the context menu, or press Ctrl + U.
A dialog box appears with a summary of changes that will be made. Confirm the changes by clicking on Apply.

This will start the download and installation in progress you can see in the following screen

Changes are applied successfully windows and click on close

Search a Package Using Synaptic Package Manager
If you want to search a package you need to click on search option in synaptic tool bar


The best way to install new software in Ubuntu is to be connected to the Internet, but sometimes this is not possible. When you install Ubuntu the first time, your install CD should have been added as a repository.
Go to Settings--->Repositories

You now can download the entire Universe and Multiverse repositories on a set of DVD's and CD's from here
This tools is very simple to use for new users how to install,remove,upgrade packages Using Synaptic Package Manager
0 comments:
Post a Comment